I can’t even begin to count the number of times I’ve seen car audio speakers installed improperly in the doors, dash or rear deck of a car or truck. Many amateur car audio enthusiasts don’t understand that unlike home audio and Bluetooth speakers that come in an enclosure, the way that raw speakers are mounted in your vehicle plays a huge role in what they’ll sound like. Let’s do a few simple tests to quantify the importance of proper speaker installation.
Why Do Speakers Need an Enclosure?
When we talk about car audio speakers, 99% of the time we’re talking about a woofer or midrange driver that doesn’t have an enclosure. The days of the Pioneer Tune-Up and rear parcel shelf enclosures are long gone. If we look at one of these speakers, we will find that the basket to which the driver components are assembled is open on the back. The openings in the basket prevent air pressure changes behind the woofer cone as it moves forward or rearward. Many companies that employ Klippel testing to design their speakers will add vents under the spider mounting ledge for the same reason: to allow for more linear performance, especially at high excursion levels.
Because the back of the woofer cone is open, sound is created behind the speaker as the cone moves forward and rearward. The problem with the sound coming off the back of the cone, often called the “rear wave,” is that it’s opposite in polarity to the sound coming from the front. When the two sound sources mix, they cancel each other out.
If you were to put a 6.5-inch woofer on a table and feed it a 150-Hz test tone, you wouldn’t hear much. When a speaker is mounted in an enclosure, the rear wave sound is trapped in that enclosure and doesn’t cause this cancellation. This phenomenon is most critical at bass, midbass and lower midrange frequencies. Subwoofer enclosures are slightly different in that they also control cone motion at low frequencies – but that’s an entirely different discussion. If we were to mount a speaker in the middle of a wall in our home, there is no way for the sound coming from the back to mix with and cancel the sound from the front. If there is, the sound likely has to travel a long distance, and it will lose enough energy that it becomes effectively irrelevant. We call this an infinite baffle installation because the wall acts as a divider to prevent the two sounds from mixing.
Car Door Speaker Installations
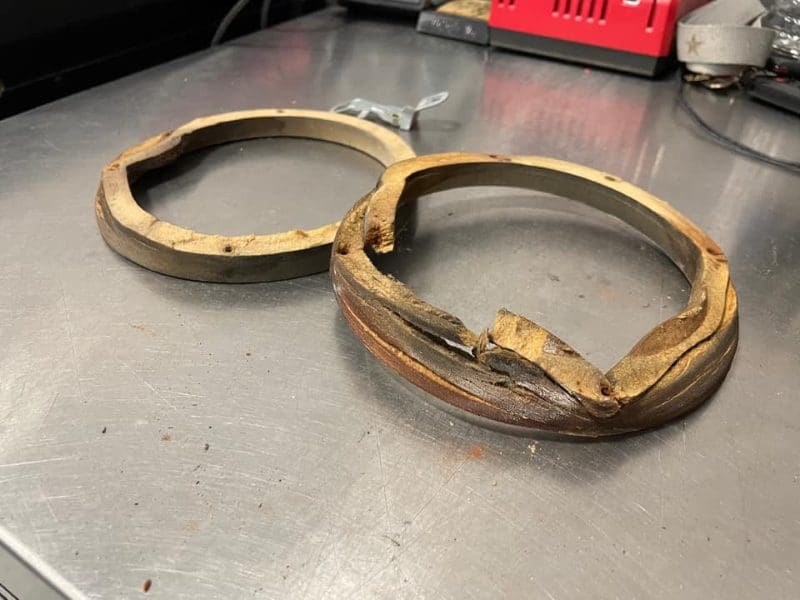
When a speaker is mounted in a car door, the metal or plastic on the inside door frame must act as this baffle. If the speaker isn’t sealed against the mounting surface, sound from the back can leak through and cancel with the sound from the front. If the mounting surface has holes in it, the same thing happens. Investing in a layer of sound deadening material on the inner skins of your vehicle’s doors is an excellent investment. Even holes for wiring and fasteners can allow cancellation. If you have a speaker with a dozen holes in the mounting lip to allow it to bolt into several different fastener locations, making sure those are sealed is also essential.
Testing Speaker Installations
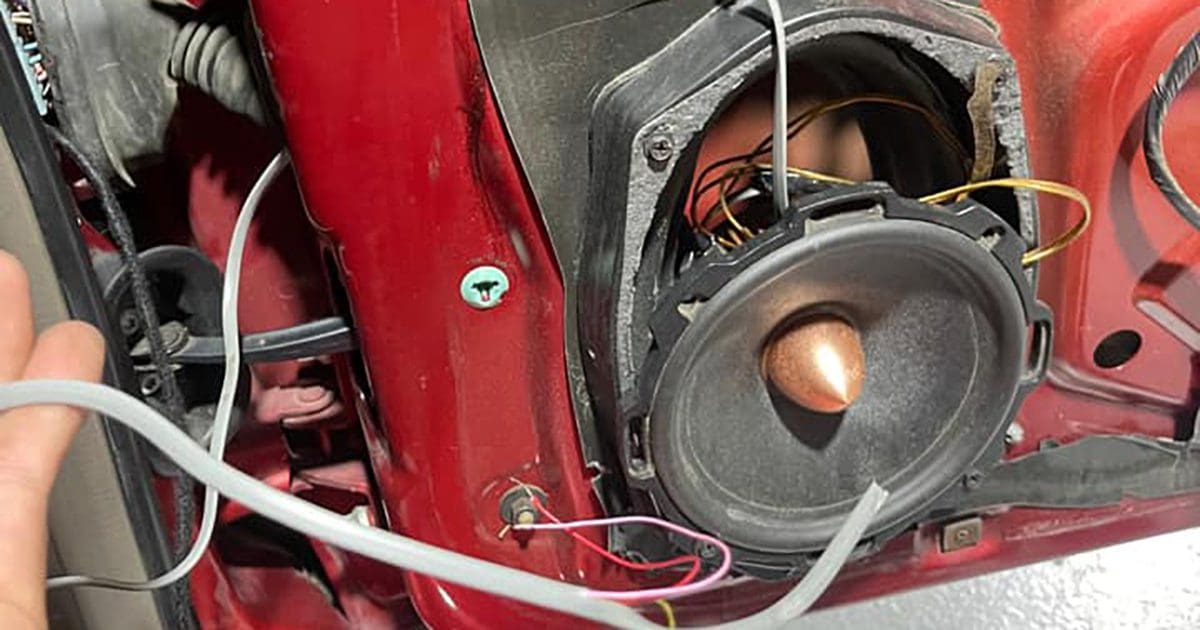
I scrounged the lab for a reasonable quality speaker to do this test. I found an old 6.5-inch woofer from a Clarion SRD1700S speaker set I had in one of my vehicles. If you know your car audio speakers, you’ll likely recognize the company that built these drivers for Clarion.
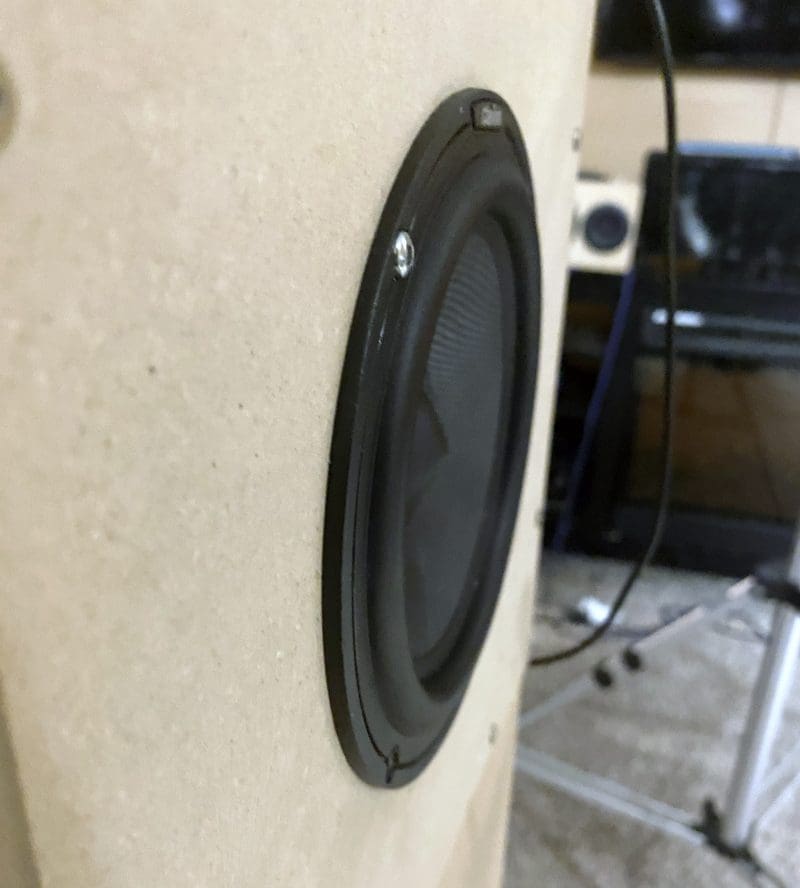
For the first measurement, I set the speaker in my test enclosure and connected the test leads to the amplifier. As you can see from the image below, the speaker certainly wasn’t “installed” properly. Sadly, this mimics many installations I see pictures of all the time.
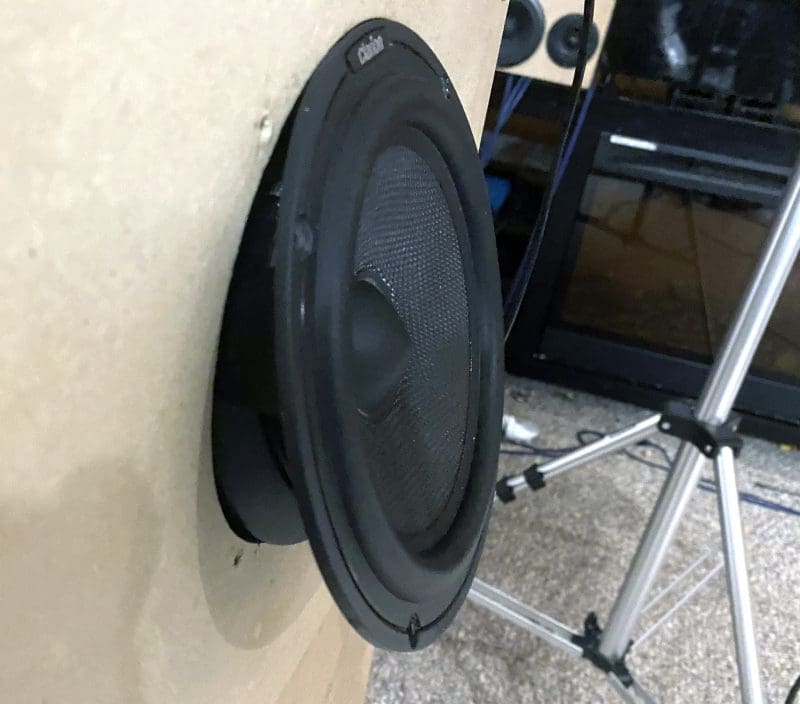
I set my Clio Pocket microphone at an arbitrary distance of 7 inches from the speaker. I chose this close proximity as I didn’t want the acoustics of my lab to affect the measurement. Yes, I bought lottery tickets, and I WILL build an anechoic chamber if I win big!
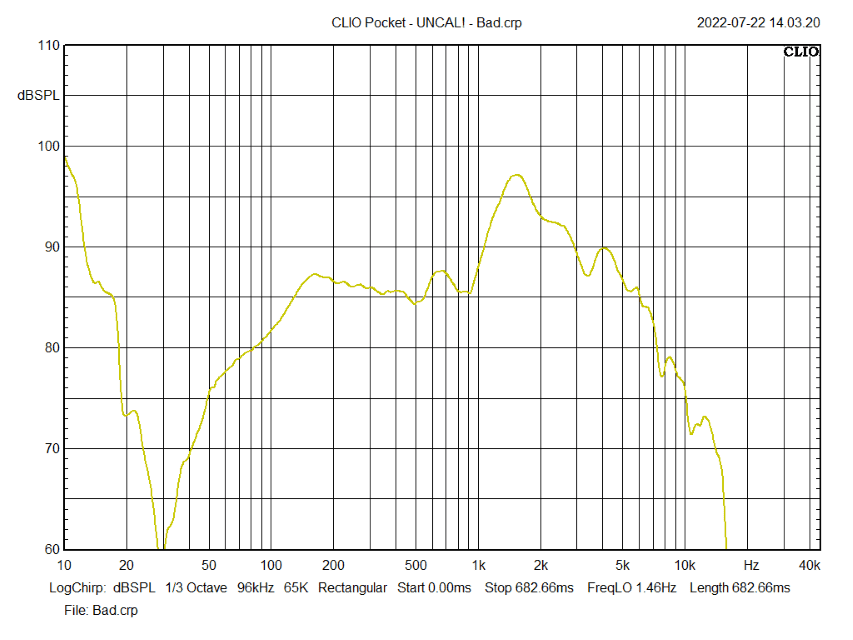
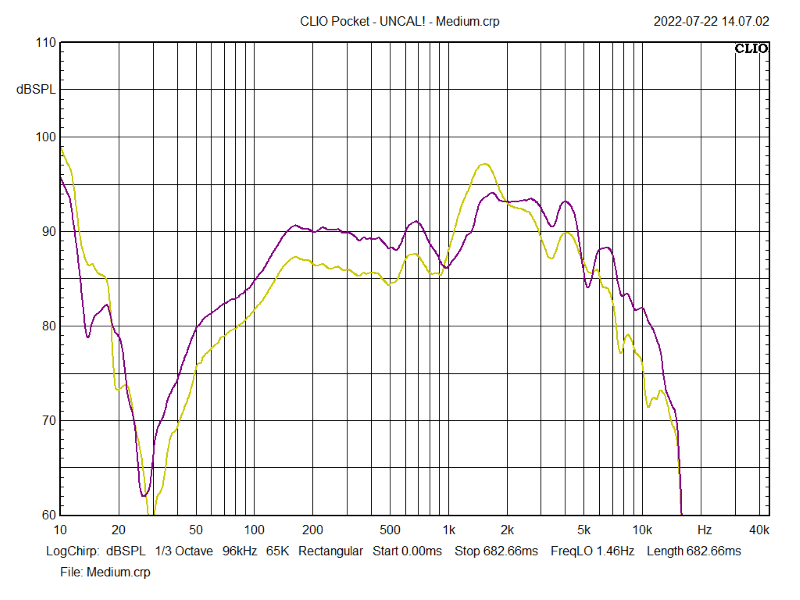
As you can see, the response from 140 Hz to 900 Hz is relatively flat; then there’s a massive 13 dB spike around 1.6 kHz. If you listened to this speaker, you’d be disappointed.
Better but Still Terrible Speaker Installation
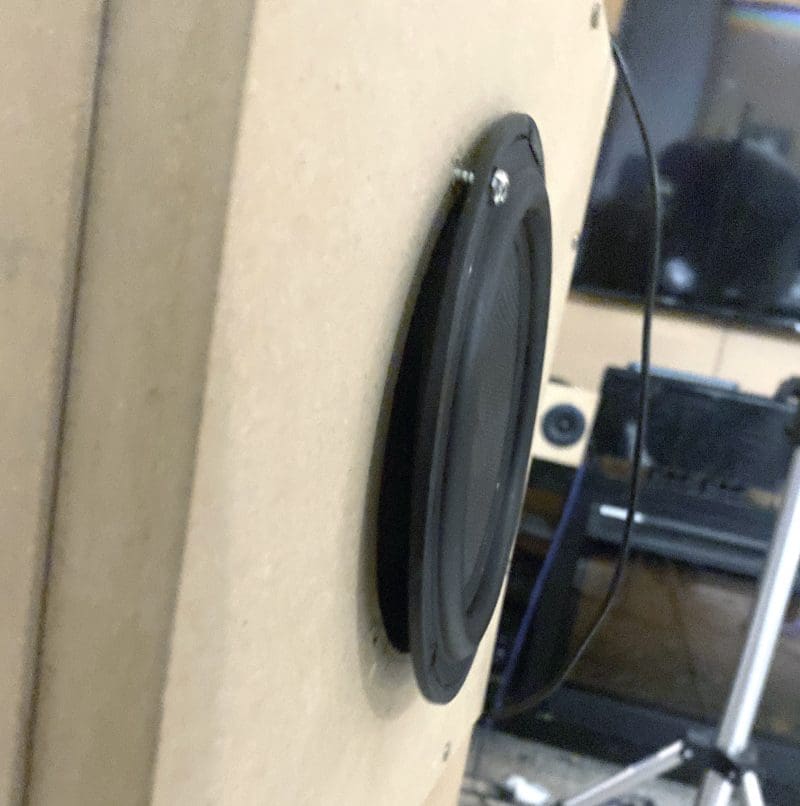
The next test had the speaker held in place with two screws, but neither was tightened to where the speaker was pulled up tight against the mounting surface. This simulates an installation where there are severe leaks around the speaker.
The violet trace in the frequency response chart below shows that there has been an increase in output of about 5 dB SPL at all frequencies below 700 Hz. There is still an 8 dB difference between 1 and 1.7 kHz, which is less than ideal but not as disastrous as the original measurement.
Some quick math shows us that this 5 dB increase in output is equivalent to going from 10 watts of power to 31.6 watts to produce the same increase. Put another way, we could feed this second installation with 10 watts of power or the first with 31.6 watts to produce the same output in the mid-bass and lower midrange region. Since we know that all speakers produce more distortion at higher excursion levels, a free gain in efficiency of 5 dB SPL is a better choice.
OK, time to do this properly. I tightened the screws to pull the speaker tight to the baffle. In each measurement, I moved the microphone to ensure that I was getting a reading at the same distance from the cone and that any variances in the measurement could be attributed to the installation and not my testing configuration. You can see how much things improved in the frequency response graph below.
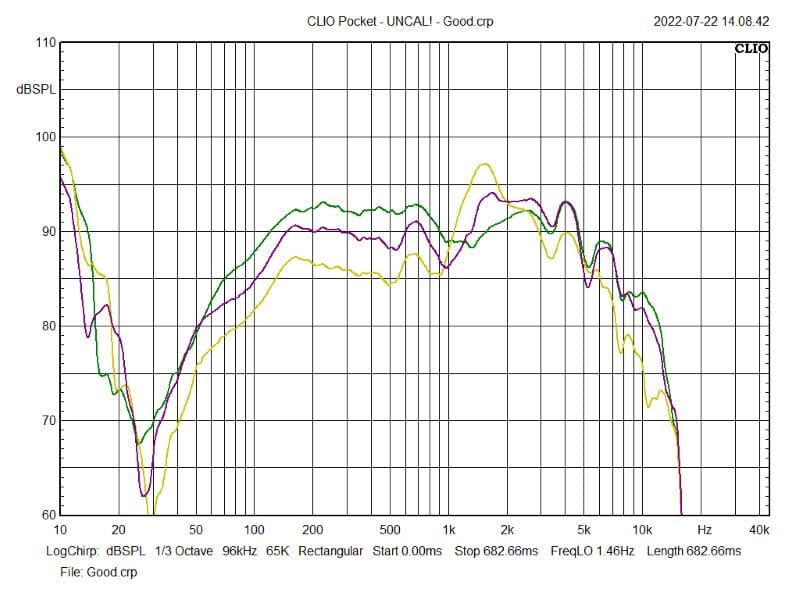
The speaker has picked up another 2 to 3 dB of output compared to the mediocre installation. If we fed this speaker 10 watts of power, the mediocre installation would need about 20 watts to produce the same result. The poor installation would need 63 watts. Very few 6.5-inch speakers would survive being fed more than 60 watts of power at bass frequencies for very long.
Proper Speaker Installation Ensures Reliable Performance
How your speakers are installed in your car or truck is critical to the performance and longevity of your audio system. An investment in having the shop you’re working with create high-quality mounting adapters (as needed) and install sound deadening for speaker installation is worthwhile. Proper installation can dramatically improve the performance and efficiency of your entire system.
This article is written and produced by the team at www.BestCarAudio.com. Reproduction or use of any kind is prohibited without the express written permission of 1sixty8 media.